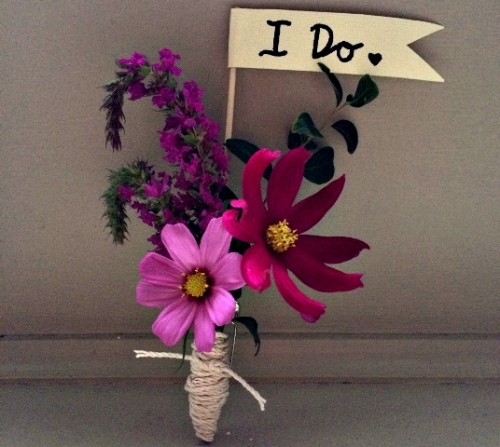
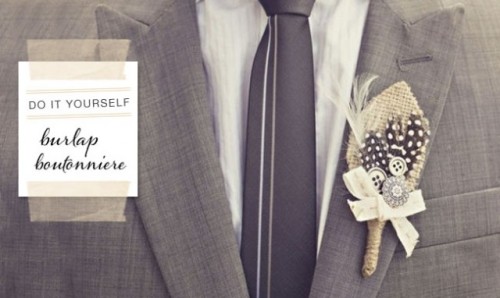
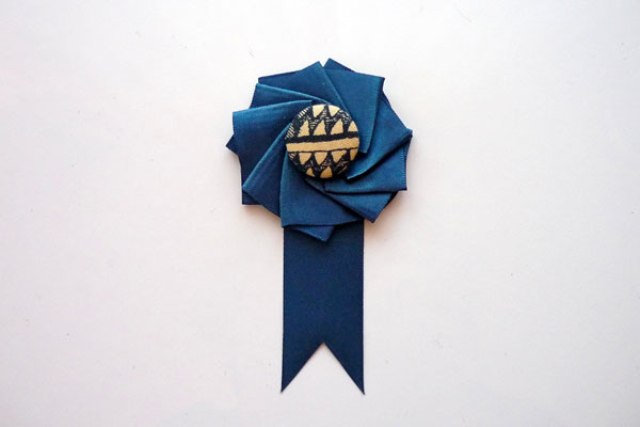
Elegant Rustic DIY Burlap Boutonniere

Elegant Rustic DIY Burlap Boutonniere
It’s not an easy-to-make project yet a great and cute accessory if you prepare for a rustic wedding. You will need burlap, cereal box-weight cardboard, three kinds of buttons, two kinds of feathers, pin backs, natural jewelry cord, glue, hot glue gun, 3/4″ wide ribbon, embroidery floss, big needle and sturdy bamboo skewers. First you’ll need... 
MORE PICTURES

DIY Geometric Boutonniere With Billy Balls

DIY Geometric Boutonniere With Billy Balls
A boutonniere is a necessary thing for every groom, and to get a personalized accessory it’s better to make it yourself. Let’s make a trendy geometric boutonniere! You’ll need scissors, a ruler, a craft knife, a bone folder, glue, floral tape, 1/4’’ ribbon, boutonniere pins, a paper gem template, colored paper. Print and trim gem... 
MORE PICTURES
Updated:

Adorable DIY Summer Floral Boutonniere

Adorable DIY Summer Floral Boutonniere
Summer wedding season is slowly coming to an end, but flowers are still all the rage! It’s trendy to use them literally everywhere, and it seems like there’s no way you can go too far with this. We try to keep abreast, so today we are sharing a very sweet boutonniere tutorial for your groom... 
MORE PICTURES

45 Bright And Fresh Spring Groom Boutonnieres

45 Bright And Fresh Spring Groom Boutonnieres
A boutonniere is a necessary accessory for any groom, and it should continue the style and the colors you’ve chosen, or maybe look as a tiny copy of the bridal bouquet. Spring boutonnieres are special, they are light, sweet, fresh, mostly with fresh flowers and plants – cool and inspiring accessories to highlight the groom’s... 
MORE PICTURES
Updated:

Cute DIY Seashell Boutonniere

Cute DIY Seashell Boutonniere
If you want to make something for your groom, something special for him, make a small cool piece like a boutonniere. This one will be a sea-themed piece, that’s cool for sea-themed wedding or a coastal wedding. The supplies are a hot glue gun, raffia, a shell, a pin back. Glue the pin back to... 
MORE PICTURES
Updated: